How To Enable Webcam On Remote Desktop Connection
The steps to enable a Webcam in a Remote Desktop Connection are as follows:
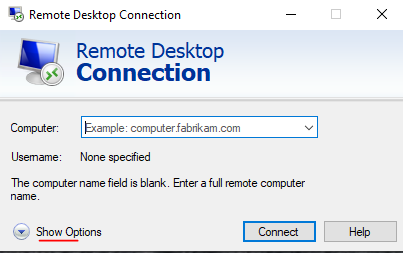
Step-1: On your local desktop, open the Remote Desktop Connection client and click the 'Show Options' button.
Step-2: Click on the 'Local Resources' tab, then select 'Settings' under the 'Remote audio' section.
Step-3: Under 'Local devices and resources,' click the 'More…' button, then select your camera and any additional devices you'd like to access remotely. It's generally recommended to enable 'Other supported Plug and Play (PnP) devices' for enhanced device compatibility.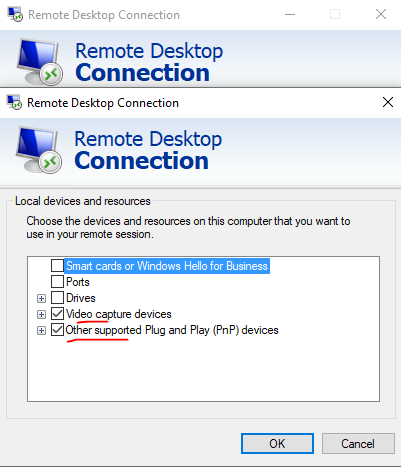
Step-4: After clicking 'OK,' you can seamlessly connect to your remote desktop just as you usually do.
We hope you understand how to enable the Webcam in Remote Desktop Connection.
Thank you for staying with Alpha Net!